Building multiple Citrix Images with one Microsoft MDT task sequence
Continuing on the discussion of Automating the Citrix Image build process with MDT. One small problem is that there’s never just one image to do. You probably have an Image for a couple different line of businesses, another Image for these 3 Developers, an Administrator image, and maybe a few more images for other miscellaneous reasons.
At one point, the team I consulted for called their Citrix Desktop the ‘Unicorn Desktop’. We thought we could get away with having just 1 image. Very quickly we were reeled back to reality. While we keep striving to maintain just one image, we are always faced with some scenarios that keeps on adding more to the list. Technologies like App-V, App-V Scheduler, Powershell, ControlUP, and other automation vendors can help decrease the amount of images you maintain, but inevitably my guess is you’ll always have more than one.
If your using MDT/SCCM you’ll want to consolidate your efforts as much as possible. This means we’ll at least strive to have only one task sequence, the ‘Unicorn Task Sequence’ we’ll call it. So how does this look?
First, let’s start by examining the customsettings.ini.
[Settings]
Priority=Init,Image,Default
Properties=MyCustomProperty;BIOSVersion;SMBIOSBIOSVersion;ProductVersion,ComputerSerialNumber,MAC,OSVER
[Init]
ComputerSerialNumber=#Right("%SerialNumber%",7)#
MAC=#Replace("%MacAddress001%",":","")#
[Image]
Subsection=%MAC%
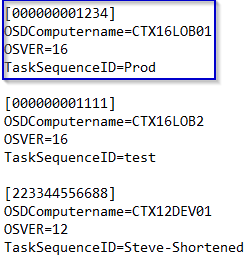
[000000001234]
OSDComputername=CTX16LOB01
OSVER=16
TaskSequenceID=Prod
[000000001111]
OSDComputername=CTX16LOB2
OSVER=16
TaskSequenceID=test
[223344556688]
OSDComputername=CTX12DEV01
OSVER=12
TaskSequenceID=Steve-Shortened
[Default]
_SMSTSORGNAME=AAA
OSInstall=Y
DoNotCreateExtraPartition=YES
UserDataLocation=AUTO
TimeZoneName=Central Standard Time
SLShare=\\monitor.domain.com\Logs$
ScanStateArgs=/ue:*\* /ui:AAA\*
HideShell=YES
ApplyGPOPack=NO
SkipAdminPassword=YES
AdminPassword=supersecret
SkipApplications=YES
SkipBDDWelcome=YES
SkipBitLocker=YES
SkipComputerBackup=YES
SkipComputerName=YES
SkipDeploymentType=YES
SkipDomainMembership=YES
SkipUserData=YES
SkipFinalSummary=YES
SkipLocaleSelection=YES
SkipPackageDisplay=YES
SkipProductKey=YES
SkipRoles=YES
SkipSummary=YES
SkipTaskSequence=YES
SkipTimeZone=YES
DeploymentType=NEWCOMPUTER
SkipCapture=YES
;FinishAction=REBOOT
EventService=https://monitor.domain.com:9800The [Settings] section tells how MDT is going to traverse the different sections below.

So when MDT process starts, it will start with the ‘Init’ section, then move onto ‘Image’, then ‘Default’. The ‘Properties=’ defines variables that are used in the different sections.
In our case, the important variable here is the MAC variable. In this case, it’s the MAC address.

When the machines boots, it will define the MAC variable with it’s MAC address, without ‘:’. Example: MAC=001122334455
After the ‘Init’ section, MDT moves onto ‘Image’
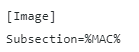
From here, MDT says goto the subsection, which is the MAC address variable. The subsections are defined with the brackets, ex: [subsection] , and can contain anything. In our case, the subsections contain the MAC address with a couple other variables defined. If the machine you are using has a MAC address of ‘000000001234’, MDT will process that following subsection.
Here is what the actual VMs look like on your hypervisor of choice.

Now that we are in the subsection [000000001234], we are defining a couple variables. OSDComputername, OSVer, and TaskSequenceID. The OSDComputername is what we will name the computer in Windows, this should match the VM name as well. The OSVER variable defines our Operating System version. This get’s called later in the actual task sequence. The TaskSequenceID is the ID of the actual task sequence that is used. You can get this from MDT console. You can see in the examples we are calling different task sequences depending on what machine(MAC) we are using. Now I know the title of this blog says ‘One’ task sequence. This is true for our actual Production runs. However, we do have other task sequences defined. For example, when we want to run a shortened version, or if we want to simply skip the OS run and just want to test out one or two application installs.
After the specific MAC subsection gets called. MDT moves onto the [Default] section. This section defines lots of different settings on how you want MDT to operate, alert, and prompt. I won’t go into each one in detail here as there are lots of websites that go into detail. However, those are the settings that I use for our production MDT environment.
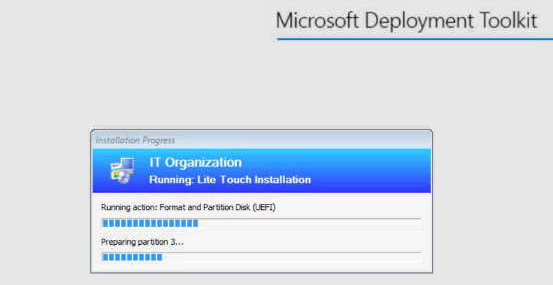
By the time the [Default] section is done, the specific Task Sequence you used in ‘TaskSequenceID’ should be starting. Once it gets to the ‘Install’ part, we create separate ‘Groups’/Folders for our Operating Systems. We then can add a ‘condition’ if the OSVER variable equals whatever value we chose in the customsettings.ini section. (We could also key off the machine name here too)

On the ‘Server 2016′ group, if the OSVER is equal to ’16’, then it installs Server 2016. On the ‘Server 2012R2′ group, we change the OSVER value to ’12’. After the OS is installed, the task sequence just moves down the list. The ‘State Restore’ is the TS section that contains most of your image content, such as application installs, registry settings, custom powershell scripts, etc…
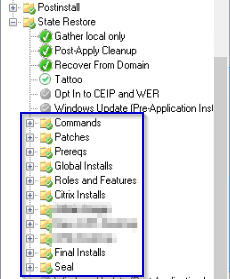
Notice we have a ‘Commands’ section. This contains different settings such as creation of log directories, setting time, disabling UAC, IPv6, System Restore, Page file and other related settings. ‘Patches’ and ‘PreReqs’ are groups that you may need to use to apply specific patches that your OS/WIM may not already have. Maybe an out of band Windows Update or something similar. The ‘Global Intalls’ group contains applications that are installed no matter what Image we are deploying. This is where I put C++ redistributes, Office, Silverlight, Chrome, Firefox, Adobe Reader, BIS-F, etc… The ‘Roles and Features’ contains unique Windows Roles and Features we want installed. ‘Citrix Installs’ contains all the necessary installs for Citrix, like, Receiver, VDA, Connection Quality Indicator, PVS Target Devices, etc…
The 3 ‘blurred’ groups are the specific different Images you are creating, Maybe the first one says ‘Admin Image, ‘Line of Business 1’ or ‘Developers’ or something like that. In my case we’ll call it ‘Admin Image’. This image will contain necessary tools to Administer the environment such as ADUC, Citrix Studio, and all the rest of the necessary consoles to Admin the environment.
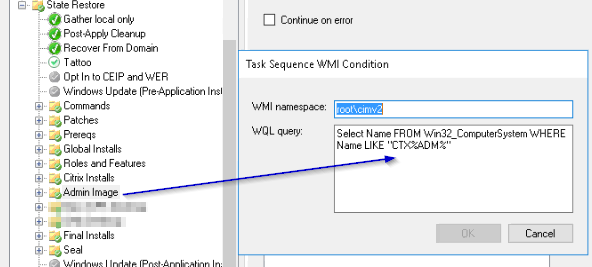
As you can see above I’m creating another ‘condition’. If the computername (OSDComputername variable) is like ‘CTX%ADM%’. So if the VM/Machinename we were using was ‘CTXVDA-ADM001’ then MDT would execute this portion of the task sequence.
The ‘Final Installs’ Group contains any final activities. This is actually where I put my AV install, miscellaneous security fixes, compliance requirements, etc…
The ‘Seal’ Group contains the the final domain join, MDT log and notification/alerts, and BIS-F seal.
I hope you now are able to see how you can have a bunch of ‘shell’ VMs that are named differently according to what Image/Task Sequence you want to execute. With this approach we can start simultaneous machine builds at once, without stepping on any toes. You can size the VMs to whatever CPU/Memory size you like. I size them pretty big as I want this process to go quick and since they aren’t always on at once, I’m not too concerned about resources.
If you are just getting started I would encourage you to head over to https://xenappblog.com/ and check out his ‘Automation Framework’. Eric does an awesome job on simplifying the install and giving you the foundation you need to take this whole process from nothing to a production task sequence with little effort.
In future blog posts I’d like to go into a little more detail on the Task Sequence itself, how I create the OS WIM (OSDbuilder), Different types of alerting/monitoring I’m performing, and some other tips and tricks that you might find useful.
