VSAN in the Home Lab – Part 1
Storage is one of the building blocks for having a solid foundation. Even in a Home Lab you need something you can depend on. Without a solid performing storage solution the experience will suffer and no matter how great the application is written, it won’t function.
In this blog post i’ll walk through the process of enabling, configuring, and health checking VMware VSAN. In Part 2 of this series I’ll give a bit more insight into the performance with IOPs/Throughput/Latency metrics.
A lot of times the hardware is just as important as the software running it. Unfortunately I don’t have the luxury for best in class hosts, but they should suffice.
- Host 1:
- HP Proliant DL160 G6
- 64GB of Memory
- 16vCPU including HT
- 1Gbps Network
- Kingston SSD 240GB
- Seagate 150GB 7200RPM
- HP Proliant DL160 G6
- Host 2
- HP Proliant DL160 G6
- 48GB Memory
- 16vCPU including HT
- 1Gbps Network
- Kingston SSD 240GB
- Western Digital 600GB 10k SAS
- HP Proliant DL160 G6
- Host 3
- HP Proliant SE316M1 (Basically a G6 with 2.5 bays instead of 3.5)
- 24GB Memory
- 16vCPU including HT
- 1Gbps Network
- Samsung 850 SSD – 250GB
- Western Digital 600GB 10k SAS
- HP Proliant SE316M1 (Basically a G6 with 2.5 bays instead of 3.5)
Well let’s get started shall we.
- Let’s Enable VSAN on the cluster

- I chose the manual approach as I don’t want all disks added.
- Enable VSAN on the VMkernel adapters
- If you are using disks that are re-purposed then they might have partitions on them already. If so, delete the partitions.
- Claim your disks, which is composed of a HDD/SSD tier or an all SSD tier.

- This automatically added each Host/Disk to one Grouping called ‘Group 1’,


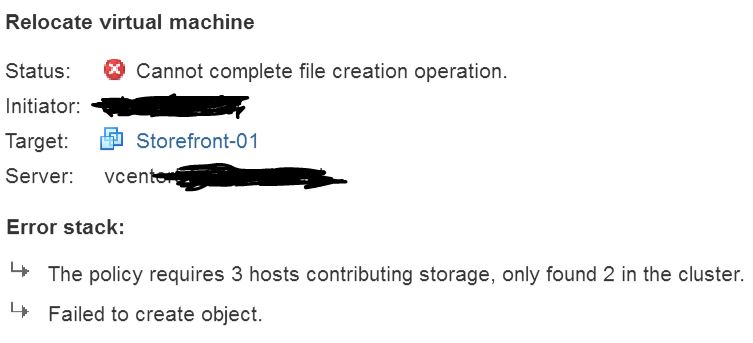
I’d like to say everything worked fine and dandy off the bat, but that wasn’t the case. I kept getting the error below. Tried disabling/enabling VSAN, re-configuring VM Storage policy, adjusting fault domains, checking VSAN health, etc… In the end I had to remove the disk group from each host. I then recreated the disk group (#4). After performing this I noticed a new number for my overall storage space increased from 700GB to 2.49TB. Even better! Everything seems to be functional now and the health checks are barking at me anymore.
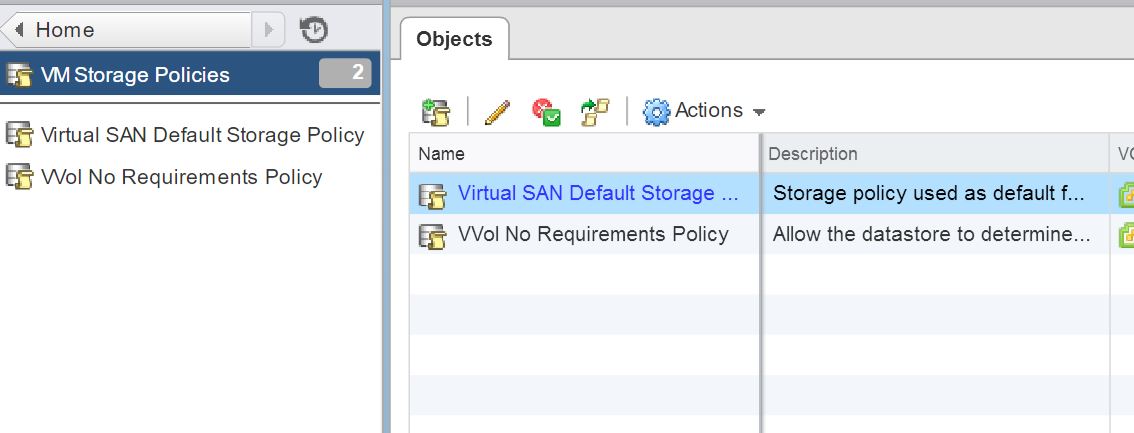
You should now have a working Datastore that you can add VMs and data into. You should know that there is a default VM Storage Policy applied to the VSAN datastore. Should you find the need to tweak settings, you can go here (screenshot). Visit this site for more information on the values (https://pubs.vmware.com/vsphere-55/index.jsp?topic=%2Fcom.vmware.vsphere.storage.doc%2FGUID-C8E919D0-9D80-4AE1-826B-D180632775F3.html
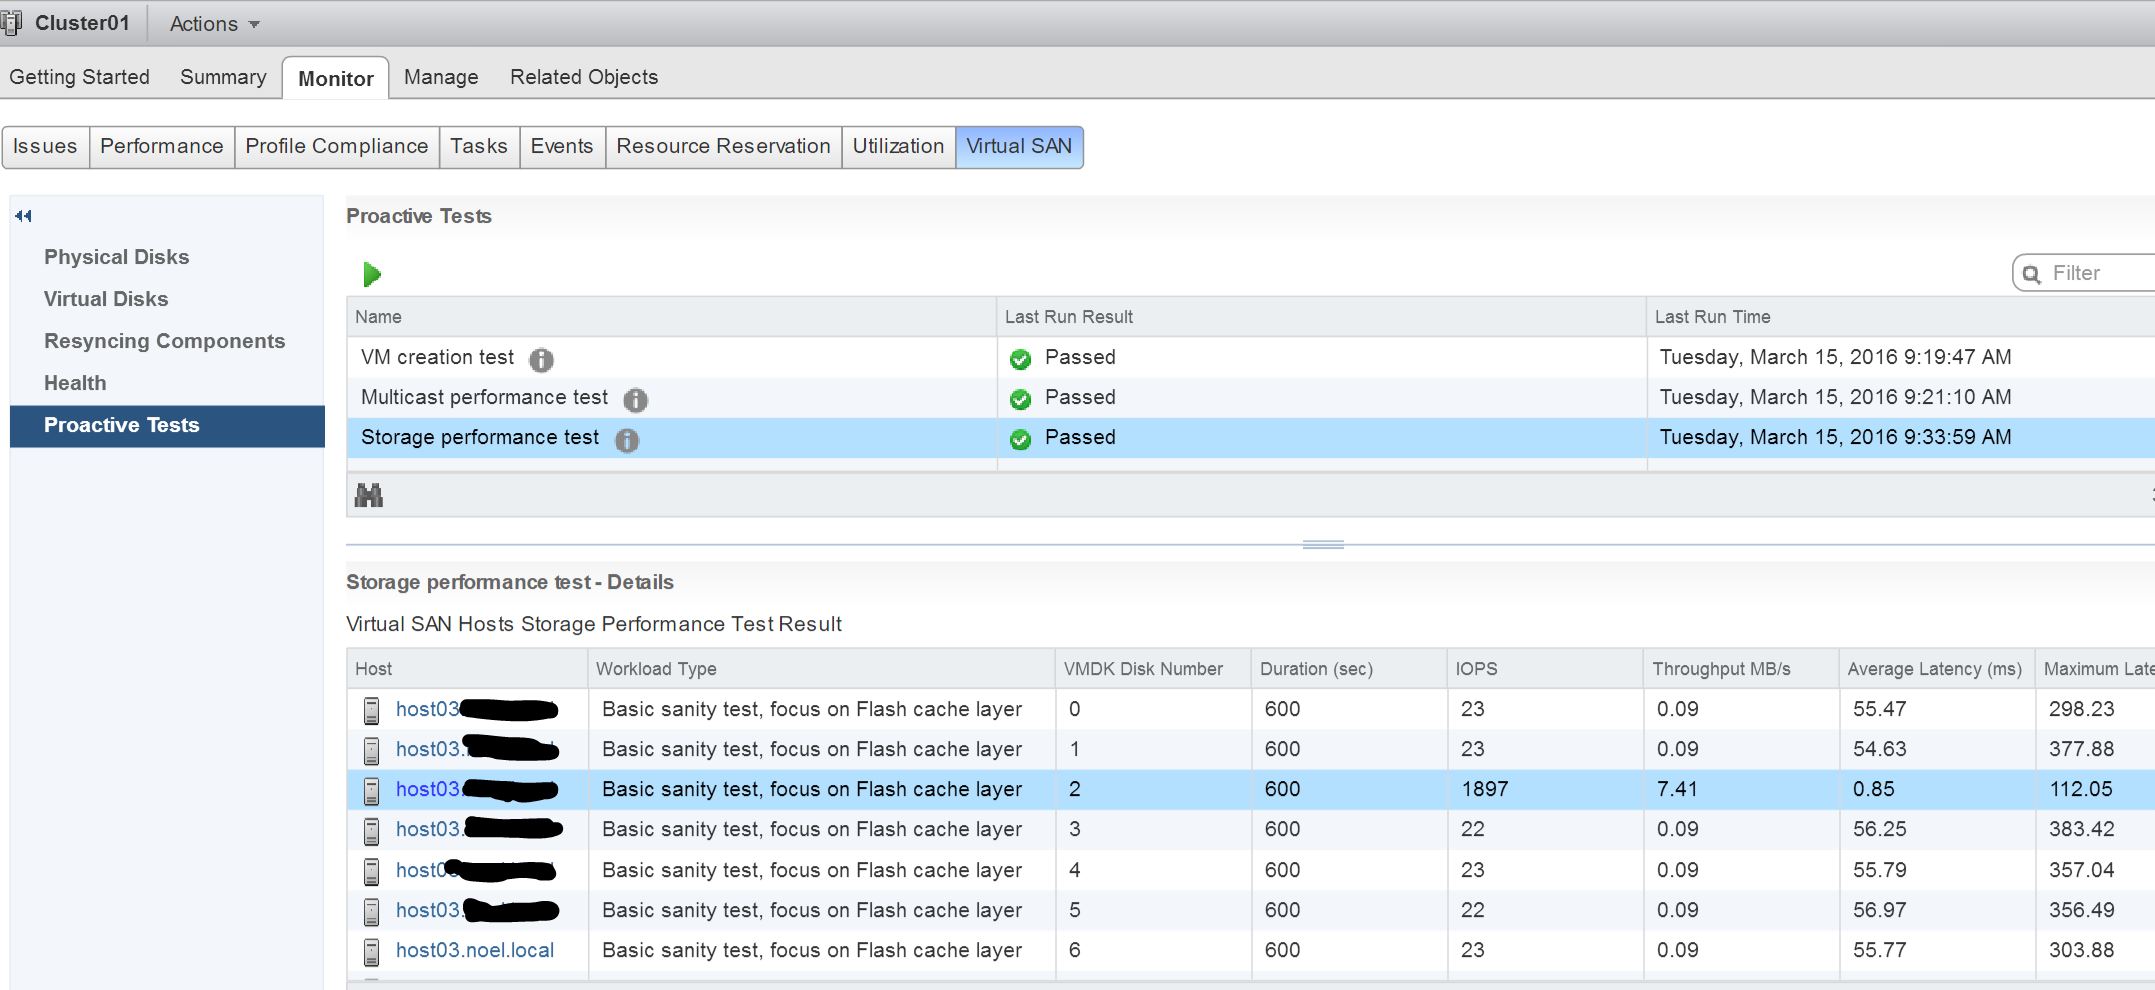
From an overall perspective you can dive into the health of the VSAN components. Simply go to the 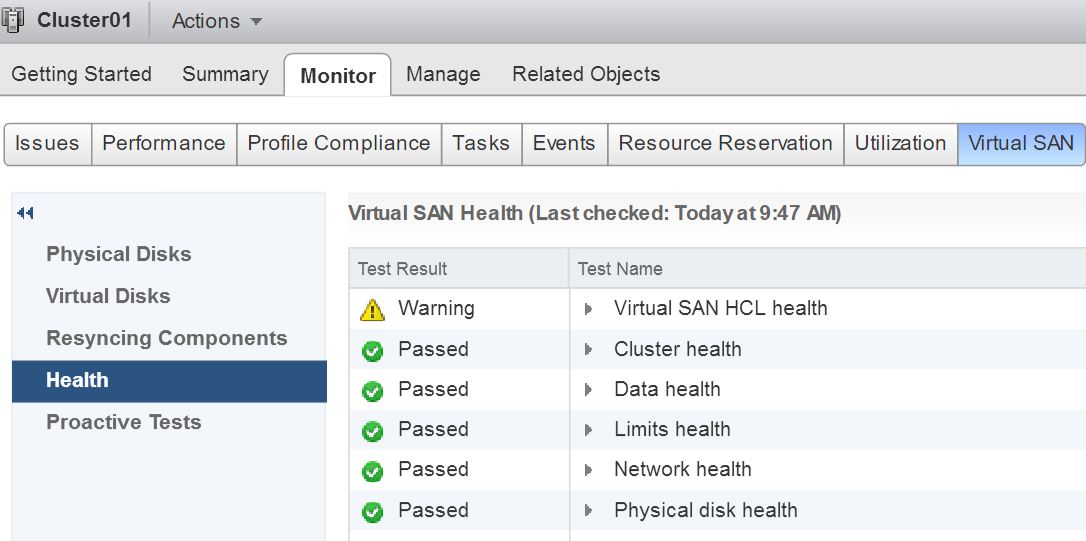 Cluster/Monitor/VSAN. Here you can see they have a few different tabs that paint an overall health picture. From here you get a glimpse of how healthy your environment looks, as well as running a few performance tests to assess what kind of iops/latency you can expect.
In Part 2 of this blog post series I’ll run some additional performance tools to get a better understanding of how VSAN performs with this hardware.
Stay tuned!
Sources: